• Dear forum visitor,

    It looks as though you have not registered for a forum account, or are not signed in. In order to participate in current discussions or create new threads, you will need to register for a forum account by clicking on the link below.

    Click here to register for a forum account!

    If you already have a forum account, you can simply click on the 'Log in' button at the top right of your forum screen.

    Your Elvenar Team

Spire Spire of Eternity Information

Darielle

Chef, Scroll-Keeper, and Buddy Fan Club Member
Spire Links:

GENERAL INFORMATION:


Spire of Eternity page: Direct link to the Elvenar Wiki

Current Spire of Eternity Rewards: scroll down to the last post for the current rewards

Spire of Eternity Official Elvenar Tutorial Tips and Tricks (2022)

Elvenar Official Perk Points Tutorial Video: This relates to perk points, which can also be used in the spire:

Spire of Eternity: Is it Worth It?: This is an article by Mykan that gives an honest assessment of the rewards/costs of the Spire (2020)

Reddit Post Examining the Spire of Eternity (2019). This is another post explaining the various levels and general info for the spire:

Spire of Eternity Event YouTube video: This is a video concerning the spire from 2019: MMohuts (2019)

Spire Strategies: This is a blogspot post to which a lot of players contributed. It features tips and strategies for completing the spire. (2021)

Jack Luyt's Facebook Spire of Eternity Page: A general intro and help guide for both fighting and negotiating the spire (2019)

Wise Geek's Guide to the Spire of Eternity: (Click on Number 20 in the Table of Contents to be taken to the Spire info.) Wise Geek has a fairly complete guide to many things Elvenar, including the spire.


NEGOTIATION TIPS:


Mercy's Elvenar Gems of Knowledge Diplomacy in the Spire (2020) 14 minute video; a great intro on negotiation in the spire.

Qybyrn's Elvenar Spire Negotiate Tricks (2021) 32-minute video with good info.

Irregular Dice Research Team Negotiation Video This is very detailed negotiation video. (2021)

Minimax Spire Posts: This page has several posts for both fighting and negotiating the spire, as well as general tips (2020)

Minimax Spire Video Tutorials: Tutorials for learning how to Spire (2020)

The Spire Wizard: This is a tool for helping you figure out your odds of winning a particular hand


FIGHTING TIPS:

Qybyrn Elvenar Spire Battle Tactics Part 1: Fairly thorough walkthrough and explanation (2020)

Qybyrn Elvenar Spire Battle Tactics Part 2: Good explanation of higher levels (2021)

Qybyrn Elvenar Spire Battle Tactics Part 3: Additional Battle Tactic Info (2021)

Qybyrn Elvenar Spire Battle Tactics Part 4: (2021)

Qybyrn Elvenar Spire Battle Tactics Part 5: (2021)

Qybyrn Elvenar Spire Battle Tactics Part 6: (2021)

Peter Brooks Battle Tactics Goes into strengths/weaknesses of troops (2021)

iDavis Battle Run-Through (no commentary) (2019)

Battle Run-Through by dark3031 (no vocals) (2022)
 
Last edited:

Darielle

Chef, Scroll-Keeper, and Buddy Fan Club Member
Beginner's Guide to the Spire


If you're just starting out, this is a quick, basic tutorial on what the spire is, how it works, and what you find in it.
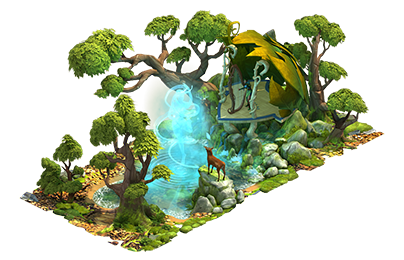
The Spire:

The Spire has three levels, the Gateway Level, the High Halls, and the Lab. Each level gets progressively harder to either fight or negotiate, but the prizes also increase in value, generally. Each level has four "rooms," and each of the rooms has four chests that you must win by either negotiating with the spirits or by fighting.

As you acquire the chests from the spirits, you may get a "bonus" chest. These may be placed anywhere on the level. Sometimes the chests are placed in a different room of the level where you have not yet gone. In that case, you will have to wait until you reach that level to open the chest and receive the special reward.

Remember to check your goods levels as well as your troop levels before you enter the spire.

Purple Bar: Unlike the tournament, the spire has a purple bar that fills to a certain level. Each person may contribute up to 63 points as they climb the spire and raise the level of the purple bar. In order to earn prizes at the end of the week for a particular level, the purple bar must rise to that level. If the purple bar is at, say, the lab level and you make it to the lab, you will earn the 125 diamonds for passing both the gateway and the high halls. If, however, you have made it to the lab but the purple bar has only risen to the high halls, then you will only earn the 50 diamonds that are normally given at the High Halls level. By the same token, if the purple bar has reached all the way to the top but you have only reached the High Halls, then you will earn the prize level for the High Halls. In other words, everyone is dependent upon others to raise the bar, but you as an individual will only earn the prize level that you have achieved and that the purple bar has reached.

A mage may add spire perk points in order to raise the purple bar to the next level. That is at the mage's discretion and if the spire perk points are available.

Now let's take each level separately:

Gateway:

Fighting: You will encounter just one wave of enemies at each chest except for the doorways, where there will be two waves. In other words, you will have to fight one round each for three of the chests per room. At the doorways, however, you will fight one round and then another with the same troops you started with. You will not add to troop levels for the second round, so choose your troops carefully so that they can defeat both rounds of enemies at the doors.

You may use vitality surges between rounds, if needed, to bolster your troops if too many have fallen during the first round. That's the only way to add troops for the second round.

Negotiation: Each spirit in the Gateway level will want one of three or four goods except for the doorways, where any of five goods will be requested (six for the big boss at the door to the High Halls). The first "room" of the Gateway asks for three goods except for the door spirit. The next 3 rooms ask for four goods for all chests except door chests. Unlike the fighting levels, you only have one "wave" of negotiation for all chests, and for each wave, you always get three guesses.

You will have three rounds to guess the goods. If you don't get any "nobody needs it" on the first round, many people recommend that you withdraw and try again, rather than keep guessing. This isn't necessary in the first room, since you can't possibly lose there if you offer each spirit a different item for each guess. But in the upper rooms and at the doors, you may wish to consider that strategy.

If you have spectral stones, you may use a stone to give to a spirit. That spirit will accept the spectral stone no matter which item it had wanted. Since they are precious, save those for the hard negotiations.

High Halls:

Fighting: Here you will start fighting two waves for all chests except the doorways, where there are three waves. The same rules apply as in the first floor. You get to choose your troops at the start of the first round and cannot replace troops for the second round except to replenish them with a vitality surge. Vitality surges can be crafted in the MA; they are worth varying percentages of troop health.

Negotiations: As you move into the High Halls, you will have a greater variety of goods wanted by the spirits, which of course, makes negotiations harder. Remember, the door spirits will always want more goods than the others. Be sure to check your goods levels periodically, as well as your gold and supplies, so that you do not run out.

Lab:

In the lab, you're going to have two waves again, but they will be harder fights. The rounds at the doors will again be three waves, but harder ones. Choose your troops at the start with all three rounds in mind. You will probably need enhancements, such as 5-day buildings out, fire phoenix fed, etc, etc, in order to produce good results.

Negotiations: Again, more items are needed. The big boss at the top of the spire will be the most challenging, with each spirit asking for one of eight different goods. Remember to withdraw if you don't get at least two and preferably more "Nobody Needs It" at this level.

Spire Prizes:

The spire offers incredibly good prizes, particularly in the door chests, the big boss chests, and the random "bonus" chests that you may win. Among the many prizes you can earn are: spell fragments, time instants, teleport spells, diamonds, artifacts, combined catalysts, portal profits, as well as rarer prizes such as trading stations (which provide a portal profit every 48 hours), magic residences, magic workshops, dwarven armorers, etc.
 

Darielle

Chef, Scroll-Keeper, and Buddy Fan Club Member
Gold Push Spire Tips for AMs and Spire Mages

By Darielle

If you've never done a fellowship gold push but think you might want to tackle it, I offer some simple tips that have worked for my fellowship, Thornwood. I want to say upfront that I'm no expert and these tips may not work for everyone, but in my two years of spire climbs, they've served me well.

This is divided into four sections: Before the Gold Push, Spire Push Battles, Spire Push Negotiations, and Fun Incentives

For many, their first spire run to the top is scary. I went halfway a few times and then decided I couldn't master it. So I gave up on spire for about 6 months until my dear friend, Atagu$, showed me what I was missing and how, with a little practice, I could become a spire pro. If I can do it, anyone can. The gold push will be tough, but it will be worth it. If your fellowship's purple bar rises to the top, then each member who climbs to the top will get a minimum of 275 diamonds for the week and probably more, since you usually win some diamonds along the way as well as the ones you get at the end of the week. If you have plenty of goods or, for fighters, plenty of 5 day buildings out and a healthy number of squads, then you won't even need to spend diamonds.

BEFORE THE SPIRE PUSH:

In the weeks before the spire push, it's important to remind your players to stock up on five-day military buildings. When I first started crafting in the MA, I always thought those buildings were a waste, since they expired in five days. Boy, was I wrong! Those buildings will make the difference between climbing to the top and losing too many troops halfway up. Grab EVERY SINGLE FIVE DAY you can find. Treat them as preciously as you do the pet food. They're your key to making it to the top. Look at it this way: if Inno paid you fifteen diamonds as an incentive to craft a five-day, you'd probably jump at the chance. By using those five days to climb a spire that you'd rather not climb, you're basically getting that return and more.

Remind players, too, that if they are close to upgrading certain wonders, they should aim to finish them before the spire push. The military wonders that will help you to fight in the spire include the following:

Needles of the Tempest: Increases the strength of Light Range Units and boosts Barrack's speed

Martial Monastery/Sanctuary: Increases the health of your troops when in battle

Dwarven Bulwark: Produces Barracks' Light Melee Units every 3 hours and increases the Barracks' Training Size

Heroes Forge: Increases the strength of your Heavy Melee Units. It will also help you negotiate by producing Orcs, if you need them for negotiation.

Shrewdy Shrooms: Produces your Barracks' Light Ranged Units every 3 hours and adds to your training size for each level in your armories.

Flying Academy: Produces units of your Barracks Mages every 3 hours and increases the training speed of your Mercenary Camp.

Temple of the Toads: Produces your Barracks' Heavy Ranged Units every 3 hours and increases the strength of your Heavy Ranged Units.

Victory Springs: Increases your Training Grounds Training Speed and gives your Light Melee Units increased damage.

Pyramid of Purification: Produces a certain amount of Heavy Melee Units for your Barracks depending on your current Units per Squad. It also will help in negotiation in the spire, since it gives you some sentient goods.

Shrine of the Champions: Produces an amount of Gruff Orc Warrior every 3 hours.

In addition to the military wonders above, there are many wonders that can help you in negotiation because they produce supplies, help you to buy goods, or they reduce the decay of goods. These include Prosperity Towers (my favorite wonder) and many more.

There are also a few event buildings that can help in troop buildup. The Garden Stones building, which expires in 10 days, offers a boost to your training size for every armory level you have.

Negotiators may wish to build another factory and level it, if they are low on certain goods. They will need more goods than they think. It goes without saying, of course, that they should only have boosted goods.

Lastly, in the week before the spire push, stock up on goods and troops. Even if you're a fighter, there may be times when you want to negotiate, and vice versa. If you have a brown bear, feed it and stock up that way.

While you're add it, make sure you mention the spire push at least once daily in chat or messages. It's important to keep the enthusiasm going so that players will be primed and ready for the big day. And it's a good idea to determine where your players are on the tech tree, as well.

For those in the last techs of Orcs and Goblins, players may wish to delay entering Wood Elves, since you begin needing orcs in the spire in Wood Elves and they may not have enough built up. For those who are in Wood Elves chapter, they may want to delay entering Sorcerers and Dragons until after the push, so that they will not need mana in the spire until S and D.

Likewise, if they are in Halflings, players may want to delay entering Elementals for the same reason. Divine Seeds are introduced in Halflings, but you won't need them in the spire until Elementals. In Elementals, you first learn about sentient goods, but you won't need sentients in the spire until the next chapter. Remind your players to check ahead and see what they will need in the spire based on the chapter they'll be in during the push, to avoid the shock of new items suddenly needed in the spire.
 
Last edited:

Darielle

Chef, Scroll-Keeper, and Buddy Fan Club Member
Gold Push Spire Tips for AMs and Spire Mages: Spire Push Battles


Now that the big day has come, put out your five-day buildings and, if you have one, feed your Fire Phoenix. When I'm going for a big push, I usually believe that overkill is better than underkill, and I like to preserve my troops whenever possible. So I put out a combination of the following buildings:

Unleashed Unit Upgrade: This is a five-day crafted in the MA that gives ALL troops a 25 percent health boost.

Enlightened Light Range: Another five-day crafted military building, it gives your Light Ranged troops a 50 percent boost in their damage capability.

Mage Multiplier: The last 5-day crafting building in the MA, it gives your mages a 50% boost in attack damage.

Dwarven Armorer: This can only be won in the spire, but it is basically an Unleashed Unit Upgrade on steroids, giving twice the power with only a 50% bigger footprint (a 2x3 building).

I usually put out 2 of each MA building plus a Dwarven Armorer, but three of each would not be too excessive. (I heard of one person who put down 7 of each and could practically nap his way to the top. Although yes, it's a waste of buildings, it sounds fun, lol.)

An important tip for fighters who auto-fight: Use as few different kinds of troops as possible on fights. For example, if you were to come up against 3 mages and 2 treants, rather than using two different kinds of troops, like Cerberus on the mages and archers on the treants, try using all 5 archers instead. If you come up against a more varied combination, such as 2 mages, 2 treants and 2 golems, use 3 archers and 2 mages rather than three types of troops. When autofighting, the AI cannot handle many different kinds of troops well. So try to get an advantage with the fewest types of troops.

I have even gone into a fight against 4 mages and 1 golem, and despite the fact that archers are weaker than golems, used 5 archers instead of 4 archers and a treant. I knew my archers were pretty powerful, and the extra boost of 2 or 3 enlightened light ranges made me pretty confident, and I was right. The AI handles fights with all the same fighter type very well, and you are more likely to win those fights with only one type of troop (provided, of course, you aren't trying to pit five Cerberus against several treants). Don't be terrified of using all five of the same troop if they are only good against four enemies, and one of the enemies is better. It still might work out better than if you used more troops (depending, of course, on the level and just how many troops the other side has).
 
Last edited:

Darielle

Chef, Scroll-Keeper, and Buddy Fan Club Member
Gold Push Spire Tips for AMs and Spire Mages: Spire Push Negotiations

Let's face it … the fighters, if they have all of the above, will certainly have an easier time of it than the negotiators. But for those who like the strategy of the spire (as I do), negotiating your way to the top can be rewarding. I've gone all the way to the big boss on total negotiation, and won. But please remember that if you do this, it will cost you tons of goods. Be prepared for the cost and don't flinch. Even if the first few weeks of spiring doesn't bring you great rewards, it will certainly pay off in the end, and far better than you imagined.

Now, for the negotiation tips:

The first couple of doors are easy breezy to tackle. You won't need to know much to win those. But when you start climbing toward the first "boss" (who stands at the door to the high halls … I call him "Virdas" but some people call him "Treant Guy") things change. You may find it better to withdraw after the first guess than to keep guessing. For example, say you have five spirits and they may want any of four items, and after your first guess they all say "wrong person," then it is often better to just withdraw, lose that first set of goods, and retry in a new hand. The best thing you could possibly get after any first guess is at least one "nobody needs it." It's more important to eliminate goods than it is to eliminate spirits.

Let's look at it by the odds. If you have five spirits and four goods, and you get four green check marks on the first guess with the last spirit saying "wrong item", that's bad! Now you have one spirit left and you still have three goods left … in other words, you have only a 33 percent chance of guessing right on the second try. And if you get that one wrong, then you will still have 2 goods left for a 50/50 chance on the third try. There's no way to up those odds. But say you have five spirits and four items, and instead on the first guess, you get no right answers but two "nobody needs it." Hooray! That means you are going into the second guess with only two goods left. It's a no brainer … offer your most abundant good to everyone (unless you offered it before) on your second guess. On your third guess, use the last item. You won.

In any encounter with spirits, at least one is most likely going to want coins or supplies (and in my experience, supplies seems to be the most popular item wanted by the spirits.) Always offer those items to one of the spirits on the first guess. Every spirit gets a different item on the first guess. Based on what I learn, I tweak what I give them in the second guess.

Don't kick yourself if you accidentally give the same item to a spirit twice. Been there, done that. Just watch carefully in the future.

As you move up into the high halls, you may want to increase the number of "nobody needs it" that you want to get on the first try. On the first floor, one is usually sufficient. On the second floor, I often withdraw if I don't get two. For the big boss at the top of the spire, I never negotiate with him unless I've gotten at least three "nobody needs it" on the first guess.

As you move up the spire, the likelihood of the spirits wanting more expensive items increases. But if you are in a situation with a 50/50 chance, I would give the spirit what I had the most of. There's nothing worse than losing a 50/50 when you've offered the thing you're really short on and could have won on the thing you have in abundance.

When there are only two items left and I'm about to make a second choice, I will always give the one item I have in abundance to every spirit that hasn't gotten that before, and then wait to see who rejects it. That will save the item I'm short on for only those spirits that want it, and I still get a guaranteed win.

All of these tips are based on "odds." The fact is, spirits sometimes defy the odds, and you may find 5 spirits wanting expensive items on the first floor and wanting cheap items on the third. But if you follow the odds consistently, you'll come out ahead.
 
Last edited:

Darielle

Chef, Scroll-Keeper, and Buddy Fan Club Member
Gold Push Spire Tips for AMs and Spire Mages: Fun Incentives

AMs and Spire Mages who make the spire push fun will always draw more participation than if they make it a chore. When I first introduced gold spire pushes to Thornwood, I created a "party" atmosphere.

The one thing that Inno has done that I LOVE LOVE LOVE has been to allow players to use excess runes to add 15 kp to another person's wonder. This has been a great boon for our spire pushes. We offer a party like atmosphere and plan for it in advance, with music, food and drinks.

You could try this too without too much KP loss to the AM or Spire Mage. If you have a lot of runes, then using them to draw interest in the spire push is the most fun way to spend them, in my opinion, and remember, every time you add one to someone's wonder, you may get something back when they complete that wonder. It's not a total loss.

For example:

Everyone who climbs to the top of the spire earns 15 KP in a random wonder (one spare rune; there are certain runes that I have 100s of that I will never use, so those work well).

The first one to climb to the top of the spire brings the virtual food and drinks to the party. They decide what we'll all be eating, and earn an extra 15KP for their effort.

The second one to climb the top of the spire decides what song we'll be singing in chat. Let's say they decide on, "Hungry Heart," and earn an extra 15 kp for their effort. Members try to remember a line from the song and add it to the chat thread.

Some people take it further, and start adding foods to the top of the spire, so now we're talking about cannolis, mai tais, baked beans, vegetarian, or whatever. It may be silly, but it draws interest, and the kp makes it fun. We're blaring out the party for a full five days.

I've actually added smaller amounts of kp for other things, such as story threads, making it to the lab (for those new ones who haven't yet done that) etc, etc etc. But you can decide ahead of time how many runes you can afford, and plan accordingly. If you only do a push every month or less, you can sustain the kp loss.
 
Last edited:

Darielle

Chef, Scroll-Keeper, and Buddy Fan Club Member
And just for fun, the unofficial names of the big bosses in the spire are 1, Virdas the treant wizard, 2, Crotar the frog prince, and 3, Froskol the giant robot. The forum contest to name them took place in May and yours truly won. :) These aren't official or anything, but since the forum voted on the names I thought I'd include them here. The story that goes with the names, who the big bosses are and how they first came to inhabit the Spire of Eternity, is HERE.
 

Darielle

Chef, Scroll-Keeper, and Buddy Fan Club Member
Extra Enhancements for Fighters in the Spire:

Some of the following are useful to help you reduce troop loss in the spire, or to gain troops.

Magic Academy Enhancements:

Unleashed Unit Upgrade-offers 25 percent health for all troops. (5-day expiration)

Mage Multiplier- offers 50 percent attack boost for all the various mages. (5-day expiration)

Enlightened Light Range- offers 50 percent attack boost for all light range troops. (5-day expiration)

(Stay tuned for a heavy range powerup, which Elvenarchitect has listed.)

Non-Expiring Buildings:

Vallorian Valor can be crafted in the Magic Academy and provides Vallorian Guards, a powerful heavy melee troop.

Grounds of the Orc Strategist is also crafted in the MA; it provides Orc Strategists, a great heavy range troop.

Other enhancements from the Magic Academy:

Vitality Surges can be crafted in the Magic Academy. They will restore a varying amount of troops, depending upon the surge. Some are 10 percent, some 50 percent, etc. They are pictured with a red heart. Be sure to check the amount they offer. You may use them after a battle to restore part of your attack force that was damaged in battle.

Spire Enhancements:

Dwarven Armorer- offers a 50 percent upgrade in health for all troops (5-day expiration)

Evolving Buildings:

The following buildings were first offered in events, but may occasionally be found in the crafting recipes in the Magic Academy. These buildings require artifacts crafted in the MA or won in the spire to evolve them up to level 10.

Fire Phoenix: Adds a certain amount of attack bonus to all of your troops when fed. Depending upon what stage the Fire Phoenix is at, it adds from 5 to 50 percent attack boost.

Brown Bear: This bear, when fed, will provide your barracks, mercenary camp, and training grounds with additional troops for 12 hours. Again, how high your boost is depends upon what stage the bear is at.

Twilight Phoenix: Heals a small amount of troops after each battle when fed.

Witches Hut: Provides Fainent Frogs, which are great heavy range troops

Witches Summoning Circle: Provides Banshees, a training academy mage.
 
Last edited:

Darielle

Chef, Scroll-Keeper, and Buddy Fan Club Member
For Negotiators in Spire:

Just wanted to focus on one thing here ... the spectral stones. Those things are awesome, but very rare. If you climb the spire and see it as a prize in any event, make sure you go for it. Spectral stones will satisfy any one spirit when you are negotiating. That can save you 25 or more diamonds.

My advice on the spectral stones is, don't waste them. Since they are so hard to come by, the best time to use them is for a major boss. (the treant at the end of the gateway, froggie at the end of the high halls, or the super tough one at the top of the third level of the spire.) I usually try to save them for the big boss at the very top.

Make sure you offer a stone only after you've taken your first two turns. That way, you don't waste a spectral stone when the boss might have taken something you offered the first or second time. Besides that, you may eliminate an item by offering goods, and that's also useful information for the other spirits, the ones who don't get the stone. Therefore, always use a spectral stone on the third guess.

If I'm tired or lazy, I sometimes use them for froggie on the third try, but I don't use them on the treant at the end of the first level. He's just too easy. But if you struggle with getting to the top of the Gateway, then that's your decision.

Edit: I just wanted to add here that today I saw spectral stones as one of the prizes in the orb in the Magic Academy. So by filling the magic orb with vision vapor, you may be able to get some spectral stones. Good luck!
 
Last edited:

Darielle

Chef, Scroll-Keeper, and Buddy Fan Club Member
Levels of the Spire: Fellowship Rewards

In each room, there are four chests. If you complete a room, you will reach a "circle" point on the progress bar in the spire. The circle point shows the gifts you will earn at the end of the week when the spire ends, IF the purple bar has reached that level.

Each person will contribute to raising the purple bar. The "Total Points Required" are the number of points that all members combined must contribute in order for the purple bar to reach that circle. For example, if you earn 10 points and your other teammates together earn 50 points, the fellowship will have a total of 60 points and the purple bar will reach the third circle. If you also reach the third circle before the end of the week, then you will win all of the prizes for the first, second, and third circles. Prizes are cumulative.

Remember, in order for you to gain the prizes for any level, the purple bar must reach that level AND you must also, individually, reach that level. If EITHER you OR the purple bar does not reach a certain level, you will not earn the prize for that level.

Fellowship Points may be used to raise perk levels in the Perk Point System. These can mean a lot during spire pushes. If your archmage uses them to raise the spire perks to maximum, then the fellowship can save up to 500 spire points for the next big push. Fellowships that don't have enough members to go to the top can still get gold at least once in a while.

IF YOU DON'T HAVE A FELLOWSHIP: You may still earn prizes for the first three circles, but that would require you, as an individual, to go to the top of the spire (or at least up to the big boss at the top). Each person may earn 60 points by reaching the big boss at the top, and another 3 points if they defeat him, for a total of 63 points. Since the purple bar will fill to the third circle level if it receives 60 points from all players, an individual playing alone may, by climbing to the top of the spire, earn the prizes for the first 3 circles. But they cannot earn any prizes beyond the third circle. To do that, you must join a fellowship.


Gateway Level

1st circle: 10 total points required


Prizes possible:

1 Combining Catalyst

2x booster 5 hour

4000x Fellowship Experience Points


2nd circle: 30 total points required

Prizes possible:

2x combining catalyst

2x booster 5 hour

4000x Fellowship Points


3rd circle: 60 total points required

Prizes possible:

2x combining catalyst

3x booster 5 hour

4000x Fellowship points


4th circle: 110 total points required

50 diamonds

1 supply windfall 50% or a 10 percent portal profit, depending on chapter

4000x Fellowship points


High Halls Level:

5th circle: 180 total points required


Prizes possible:

2x combining catalyst

3x booster 5 hour

4000x Fellowship points


6th circle: 270 total points required

Prizes possible:

2x combining catalyst

4x booster 5 hour

4000x Fellowship points


7th circle: 380 total points required

Prizes possible:

3x combining catalyst

4x booster 5 hour

4000x Fellowship points


8th circle: 520 total points required

Prizes possible:

75 diamonds

1 supply instant at 50% or a portal profit 10 percent, depending upon chapter

1 teleport

4000X Fellowship points


Laboratory:

9th circle: 690 total points required


Prizes possible:

3x combining catalyst

5x booster 5 hour

4000x Fellowship points


10th circle: 880 total points required

Prizes possible:

3x combining catalyst

5x booster 5 hour

4000x Fellowship points


11th circle: 1080 total points required

Prizes possible:

4x combining catalyst

5x booster 5 hour

4000x Fellowship points


12th circle: 1330 total points required

Prizes possible:

150 diamonds

1 supply instant 50 percent OR a portal profit 10 percent, depending upon your chapter

1 teleport

4000x Fellowship points
 
Last edited:

Darielle

Chef, Scroll-Keeper, and Buddy Fan Club Member
How are Spire Perk Points Saved or Added?

If you choose to work on the Spire perk points (spire and tourney are usually the best choices to start with), then as you gain levels, you will be able to use spire perk points to raise the purple bar in the spire and obtain a higher level reward. For each level of spire perk points you have gained, you will add 50 perk points. Two levels will get you 100 points, etc, etc.

Let's try a scenario:

You have 100 spire perk points in the "bank" and you are 20 perk points away from getting silver in the spire. You spend those 20 perk points in order to raise the purple bar to the silver level (defeating froggie). Now that you have completed the high halls, you have 80 perk points left that will carry over to the next week.

If anyone gains points after that, however, those will be added to your bank. If, for example, after you've spent those 20 perk points, someone comes along and gains five points before the end of the spire, then those 5 points will be added to your bank and you'll end with 85 points.


Let's try another scenario:

You have 100 spire perk points in the "bank" and you don't spend any. Your team makes it to the top of the spire at exactly 1330 points. Next week, when you start the spire, you will have 100 spire perk points. You won't gain any additional points because you reached a level and did not go over it the last week.

Remember, folks, only the EXCESS points, above a certain level, will be added to your bank. So if you have a gold push coming up next week, for example, and you are low on perk points this week, you might tell your people to get "close" to the next level but don't reach it. That way, you'll build up points for next week's gold push.

I hope this makes sense; message me if you have any questions, and thanks.
 

Darielle

Chef, Scroll-Keeper, and Buddy Fan Club Member
Spire Chest Prizes (updated 6/4/23)

Chest 1


1 fifteen-percent supply windfall (20-percent chance)

3 combining catalyst (20 percent chance)

500 spell fragments (60 percent chance)


Chest 2

1 two-hour booster (25-percent chance)

1 five-hour booster (35-percent chance)

1000 spell fragments (40-percent chance)


Chest 3

1 fifteen-percent coin rain (20-percent chance)

1250 spell fragments (20-percent chance)

3 one-hour boosters (60-percent chance)


Chest 4 (door to next level)

1 ten-percent portal profit (15-percent chance)

15 diamonds (20-percent chance)

1 teleport (65-percent chance)


Chest 5

1 fifteen-percent supply windfall (20-percent chance)

3 combining catalyst (20-percent chance)

500 spell fragments (60-percent chance)


Chest 6

1 two-hour booster (25-percent chance)

1 five-hour booster (35-percent chance)

1000 spell fragments (40-percent chance)


Chest 7

1 fifteen-percent coin rain (20-percent chance)

1250 spell fragments (20-percent chance)

3 one-hour boosters (60-percent chance)


Chest 8 (door to next level)

1 echoes of the forgotten artifact (5-percent chance)

1 twenty-percent supply windfall (10-percent chance)

20 diamonds (20-percent chance)

5 two-hour boosters (65-percent chance)


Chest 9

1 fifteen-percent supply windfall (20-percent chance)

3 combining catalyst (20-percent chance)

500 spell fragments (60-percent chance)


Chest 10

1 two-hour booster (25-percent chance)

1 five-hour booster (35-percent chance)

1000 spell fragments (40-percent chance)


Chest 11

1 fifteen-percent coin rain (20-percent chance)

1250 spell fragments (20-percent chance)

3 one-hour boosters (60-percent chance)


Chest 12 (door to next level)

1 echoes of the forgotten artifact (5-percent chance)

1 twenty-percent coin rain (10-percent chance)

20 diamonds (20-percent chance)

2000 spell fragments (65-percent chance)


Chest 13

1 fifteen-percent supply windfall (20-percent chance)

3 combining catalyst (20- percent chance)

500 spell fragments (60-percent chance)


Chest 14

1 two-hour booster (25-percent chance)

1 five-hour booster (35-percent chance)

1000 spell fragments (40-percent chance)


Chest 15

1 fifteen-percent coin rain (20-percent chance)

1250 spell fragments (20-percent chance)

3 one-hour boosters (60-percent chance)


Chest 16 (Final Boss of the Gateway)

1 dwarven armorer (10-percent chance)

1 echoes of the forgotten (10-percent chance)

1 magic residence (10-percent chance)

1 portal profit (30-percent chance)

50 diamonds (40-percent chance)


High Halls:

Chest 17


1 fifteen-percent supply windfall (20-percent chance)

3 combining catalyst (20-percent chance)

500 spell fragments (60-percent chance)


Chest 18

1 two-hour booster (25-percent chance)

1 five-hour booster (35-percent chance)

1000 spell fragments (40-percent chance)


Chest 19

1 fifteen-percent coin rain (20-percent chance)

1250 spell fragments (20-percent chance)

3 one-hour boosters (60-percent chance)


Chest 20 (door to next level)

1 portal profit (15 percent chance)

15 diamonds (20-percent chance)

1 teleport (65-percent chance)


Chest 21

1 fifteen-percent supply windfall (20-percent chance)

3 combining catalyst (20-percent chance)

500 spell fragments (60-percent chance)


Chest 22

1 two-hour booster (25-percent chance)

1 five-hour booster (35-percent chance)

1000 spell fragments (40-percent chance)


Chest 23

1 fifteen-percent coin rain (20-percent chance)

1250 spell fragments (20-percent chance)

3 one-hour boosters (60-percent chance)


Chest 24 (door to next level)

1 echoes of the forgotten artifact (5-percent chance)

1 twenty-percent supply windfall (10-percent chance)

20 diamonds (20-percent chance)

5 two-hour boosters (65-percent chance)


Chest 25

1 fifteen-percent supply windfall (20-percent chance)

3 combining catalyst (20-percent chance)

500 spell fragments (60-percent chance)


Chest 26

1 two-hour booster (25-percent chance)

1 five-hour booster (35-percent chance)

1000 spell fragments (40-percent chance)


Chest 27

1 fifteen-percent coin rain (20-percent chance)

1250 spell fragments (20-percent chance)

3 one-hour boosters (60-percent chance)


Chest 28 (door to next level)

1 echoes of the forgotten artifact (5-percent chance)

1 twenty-percent coin rain (10-percent chance)

20 diamonds (20-percent chance)

2000 spell fragments (65-percent chance)


Chest 29

1 fifteen-percent supply windfall (20-percent chance)

3 combining catalyst (20-percent chance)

500 spell fragments (60-percent chance)


Chest 30

1 two-hour booster (25-percent chance)

1 five-hour booster (35-percent chance)

1000 spell fragments (40-percent chance)


Chest 31

1 fifteen-percent coin rain (20-percent chance)

1250 spell fragments (20-percent chance)

3 one-hour boosters (60-percent chance)


Chest 32 (Final chest of High Halls)

1 magic workshop (5-percent chance)

1 echoes artifact (10-percent chance)

1 trading station (10-percent chance)

3000 spell fragments (10-percent chance)

1 ten-percent portal profit (30-percent chance)

75 diamonds (35-percent chance)


(I'll add the Lab chests next week; sorry guys, I got a little distracted this week with the FA.)
 
Last edited:

Darielle

Chef, Scroll-Keeper, and Buddy Fan Club Member
Here's the third level Spire prizes and their chance of occurring:

Laboratory:

Chest 33


1 fifteen-percent supply windfall (20-percent chance)

3 combining catalyst (20-percent chance)

500 spell fragments (60-percent chance)


Chest 34

1 two-hour booster (25-percent chance)

1 five-hour booster (35-percent chance)

1000 spell fragments (40-percent chance)


Chest 35

1 fifteen-percent coin rain (20-percent chance)

1250 spell fragments (20-percent chance)

3 one-hour boosters (60-percent chance)


Chest 36 (door to next level)

1 ten percent portal profit (15-percent chance)

15 diamonds (20-percent chance)

1 teleport (65-percent chance)


Chest 37:

15 percent supply instant (20-percent chance)

3 combining catalysts (20-percent chance)

500 spell fragments (60-percent chance)


Chest 38

One 2-hour hour time instant (25-percent chance)

One 5-hour time instant (35-percent chance)

1000 spell fragments (40-percent chance)


Chest 39

15 percent coin rain (20-percent chance)

1250 spell fragments (20-percent chance)

Three one-hour time instants (60-percent chance)


Chest 40 (door to next level)

1 Twilight Phoenix artifact (5-percent chance)

1 twenty-percent supply windfall (10-percent chance)

20 diamonds (20-percent chance)

5x two-hour time instants (65-percent chance)


Chest 41

1 fifteen-percent supply windfall (20-percent chance)

3 combining catalyst (20-percent chance)

500 spell fragments (60-percent chance)


Chest 42

1 two-hour booster (25-percent chance)

1 five-hour booster (35-percent chance)

1000 spell fragments (40-percent chance)


Chest 43

1 fifteen-percent coin rain (20-percent chance)

1250 spell fragments (20-percent chance)

3 one-hour boosters (60-percent chance)


Chest 44 (door to the next level)

1 Twilight Phoenix artifact (5-percent chance)

1 twenty-percent coin rain (10-percent chance)

20 diamonds (20-percent chance)

5x Sip of Clarity (65-percent chance)


Chest 45

15 percent supply instant (20-percent chance)

3 combining catalysts (20-percent chance)

500 spell fragments (60-percent chance)


Chest 46

One 2-hour hour time instant (25-percent chance)

One 5-hour time instant (35-percent chance)

1000 spell fragments (40-percent chance)


Chest 47

15 percent coin rain (20-percent chance)

1250 spell fragments (20-percent chance)

Three one-hour time instants (60-percent chance)


Chest 48 (Big Boss at the Top)


1 Twilight Phoenix artifact (5-percent chance)

1 Genie (10-percent chance)

1 Dwarven Armorer (20-percent chance)

1 twenty-five percent portal profit (20-percent chance)

4000 spell fragments (20-percent chance)

125 diamonds (25-percent chance)
 

Darielle

Chef, Scroll-Keeper, and Buddy Fan Club Member
On July 23rd, the reward dataset for the Spire of Eternity will be adjusted for the next 6 weeks.

Changes:
  • The Twilight Phoenix Artifacts Artifacts will be phased out as a possible reward for the Spire of Eternity
  • The Flower Goblin Epiphany Artifacts and craftable building will be phased in instead
  • The Echoes of the Forgotten Artifacts will also be phased in for crafting
 

Darielle

Chef, Scroll-Keeper, and Buddy Fan Club Member
Two Important Evolving Buildings:


Here are two important evolving buildings that benefit the spire, one for fighters and one for caterers:


Fire Phoenix

The best event building ever made for fighters.

Fire phoenix 4x4

Collection: once every 48 hours

The Fire Phoenix gives population, culture, and coins. It also gives a coin rain in chapters 1-5 and a 5 percent portal profit in chapters 6 and above. (Plus two rune shards, if you like those.)

At chapter 5 it gives 442 culture, 332 pop and 115K coins

At chapter 10 it gives 1938 culture and 1445 pop and 384K coins

At chapter 15 it gives 5100 culture 3910 pop and 752K coins

At chapter 20 it gives 12580 culture, 9350 pop and 1744K coins


The feeding effect lasts 24 hours and increases the damage dealt by your units against your enemies.

At stage 1: five percent increase

Stage 2: ten percent

Stage 3: 15 percent

It raises by 5 percent each level until at stage 10 (fully evolved, it gives you a 50 percent attack bonus.


Astral Phoenix:

The best event building for spire caterers, the Astral phoenix reduces diplomacy costs in the spire by up to 10 percent and gives a decent amount of pop and culture. It also gives t1+2 goods (by that I mean if you boost is, for example, marble, then it would give you +2, or, planks. Once you hit Elementals, it gives t4+2 goods (If your boost was moonstone, for example, it would give you tree gum).

The building is 4x4 and you can collect once every 48 hours.

At chapter 5, it gives 310 culture, 388 pop

At chapter 10: 1360 culture 1700 pop

At chapter 15: 3620 culture 4600 pop

At chapter 20: 8800 culture 11K pop


(Note: For the first 2 chapters it gives supplies instead of t1 plus 2)


The astral shines because of its feeding effect, which lasts 12 hours

Here's how much it reduces spire diplomacy costs:

stage 1 : 2 percent discount

Stage 2 and 3: 3 percent discount

Stage 4 and 5: 4 percent discount

Stage 6 and 7: 5 percent discount

Stage 8: 6 percent

Stage 9: 7 percent

Stage 10: 10 percent discount.


(Thank you, Flashfyre, for reminding me to post this.)
 
Last edited:

Darielle

Chef, Scroll-Keeper, and Buddy Fan Club Member
I have just been informed of this from a very reliable source:

"Something I have not seen is the option when you are in the spire to watch an "Ad" and your most damaged fighting squad is restored to 50% from 0. just by clicking the heart Icon after a battle and waiting the 5 or 6 seconds."

I haven't seen it myself, but that's awesome! If anyone here can verify that you've seen this, please PM me and I'll do an update here. Thanks!

7/5: I can now verify that two forum members have seen this ad.
 
Last edited:

Darielle

Chef, Scroll-Keeper, and Buddy Fan Club Member
Here's some pics of the ad in the Province battles:


Spire1before heart.jpg
Spire2Battle ad.jpg
 

Darielle

Chef, Scroll-Keeper, and Buddy Fan Club Member
Here's a continuation of the above pics:
SPIREAfter Add.jpg
SPIREfinal result.jpg


There was an actual ad pic, too, but I can't seem to get that one in this. But it's just a standard ad like you get outside the spire. :)
 

Darielle

Chef, Scroll-Keeper, and Buddy Fan Club Member
From the Support Team:

On July 23rd, the reward dataset for the Spire of Eternity will be adjusted for the next 6 weeks.

Changes:
  • The Twilight Phoenix Artifacts Artifacts will be phased out as a possible reward for the Spire of Eternity
  • The Flower Goblin Epiphany Artifacts and craftable building will be phased in instead
  • The Echoes of the Forgotten Artifacts will also be phased in for crafting
 
Top